Prompts
Quo supports prompts in two different places. The first is automated prompts when the parameter handling happens, and the second is to ask for prompts at a later point independently.
This can be accomplished with the prompt() function, which asks for
valid input according to a type, or the quo.prompt.Prompt object, this makes it possible to create a Prompt instance followed by calling prompt() method for every input. This creates a kind of an input session and its packed with lots of features.
You can also use the quo.confirm() function, which asks for confirmation (yes/no).
The prompt function is a quo function that displays a prompt to the user and waits for input. The purpose of the prompt function is to obtain user input from the console. It can be used to ask the user for a variety of input, including text, numbers, and boolean values. It has several optional arguments which can be used to customize the prompt and how the input is handled.
Parameters
The prompt function takes several parameters, which are explained below:
text: The text to show for the prompt. This parameter is required and must be a string. default: The default value to use if no input happens. If this is not given, it will prompt until it’s aborted. This parameter is optional and can be any data type. hide: If this is set to true, then the input value will be hidden, and asterisks printed instead. This parameter is optional and defaults to False. affirm: Asks for confirmation for the value. This parameter is optional and defaults to False. type: The type to use to check the value against. This parameter is optional and defaults to str. suffix: A suffix that should be added to the prompt. This parameter is optional and defaults to an empty string. show_default: Shows or hides the default value in the prompt. This parameter is optional and defaults to True. fg: The color for the prompt text. This parameter is optional and defaults to None. bg: The color for the prompt background. This parameter is optional and defaults to None.
Examples
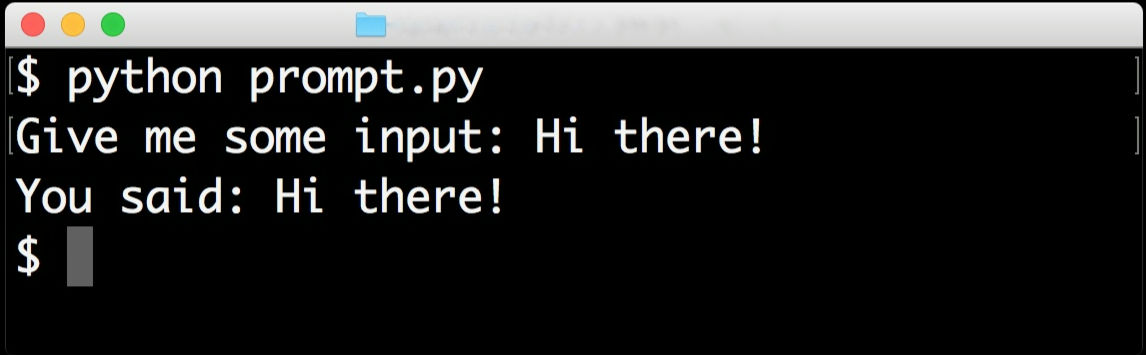
Here’s a simple example
import quo

quo.prompt('Give me some input: ')
The prompt function returns the input value provided by the user, or the default value if no input was provided. The data type of the return value will depend on the type parameter.
import quo

name = quo.prompt('What is your name?', type=str)
age =  quo.prompt('What is your age?', default=18, type=int)
Additionally, the type will be determined automatically if a default value is provided. For instance, the following will only accept floats:
import quo

quo.prompt('Please enter a number', default=42.0)
App Prompts
App prompts are integrated into the app interface. See
app-prompting for more information. Internally, it
automatically calls either quo.prompt() or quo.confirm() as necessary.
Input Validation
A prompt can have a validator attached. To manually ask for user input, you can use the quo.prompt() function or the quo.prompt.Prompt object.
For instance, you can ask for a valid integer:
from quo import prompt

prompt('Please enter a valid integer', type=int)
You can also pass the affirm flag to quo.prompt()
from quo import prompt
prompt("What is your name?: ", affirm=True)
Alternatively, you can use class:quo.types.Validator
This should implement the Validator abstract base class. This requires only one method, named type that
takes a Document as input and raises
ValidationError when the validation fails.
Added on v2022.4.4 :meth:int [bool] can be used when validating numerical characters.
Integer Validator
from quo.prompt import Prompt

session = Prompt(int=True)

number = int(session.prompt('Give a number: '))
print(f"You said: {number}")
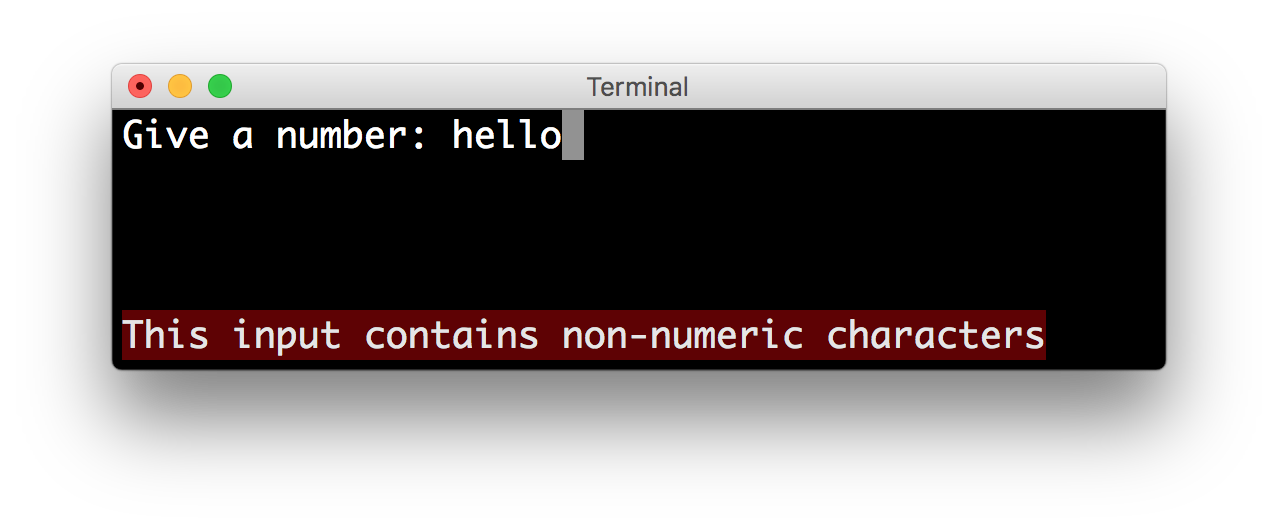
By default, the input is validated in real-time while the user is typing, but Quo can also validate after the user presses the enter key:
session = Prompt(
             int=True,
             validate_while_typing=False
             )

session.prompt('Give a number: ')
If the input validation contains some heavy CPU intensive code, but you don’t
want to block the event loop, then it’s recommended to wrap the validation class in a ThreadedValidator.
Input Prompts using Prompt() class
Input history can be kept between consecutive quo.prompt() and quo.prompt.Prompt calls incase you want to ask for multiple inputs, but each input call needs about the same arguments.
from quo import prompt

tex1 = prompt("What is your name?")
text2 = prompt("Where are you from?")
from quo.prompt import Prompt

# Create prompt object.
session = Prompt()

# Do multiple input calls.
text1 = session.prompt("What's your name?")
text2 = session.prompt("Where are you from?")
Multiline Input
Reading multiline input is as easy as passing the multiline=True parameter.
from quo.prompt import Prompt

session = Prompt(multiline=True)
session.prompt('> ')
A side effect of this is that the enter key will now insert a newline instead of accepting and returning the input. The user will now have to press Meta+Enter in order to accept the input. (Or Escape followed by Enter.)
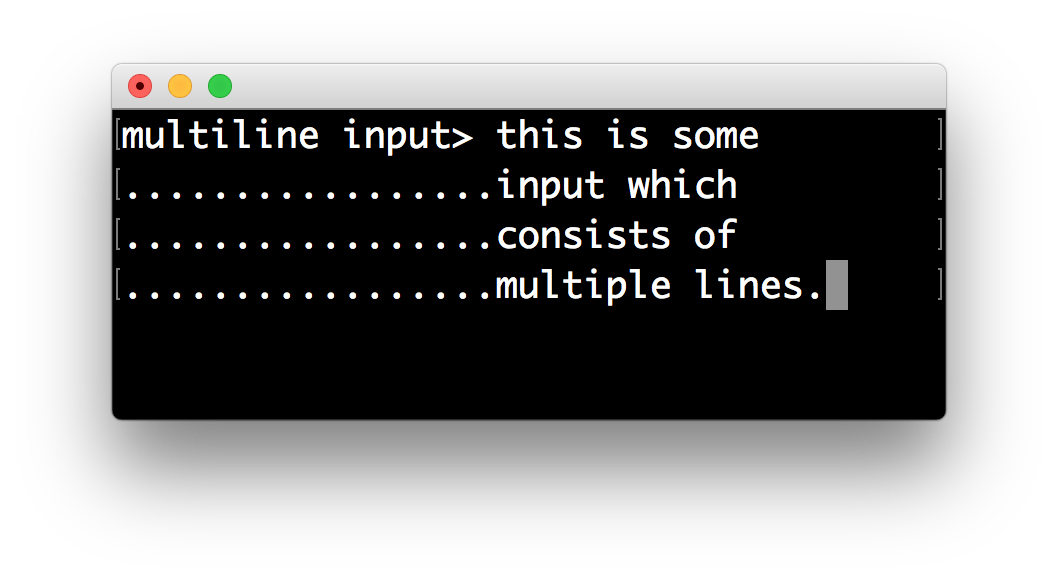
It is possible to specify a continuation prompt. This works by passing :meth:continuation [bool] to Prompt.
This function is supposed to return formatted text, or a list of (style, text) tuples. The width of the returned text should not
exceed the given width. (The width of the prompt margin is defined by the prompt.)
continuation() was added on v2022.4.4
from quo.prompt import Prompt

session = Prompt(multiline=True, continuation=True)

session.prompt('multiline input> ')
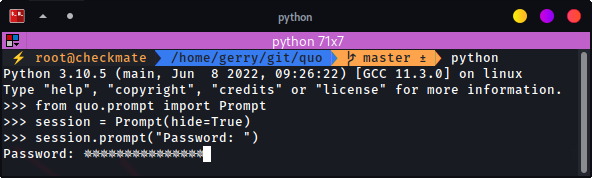
Hide Input
When the hide=True flag in quo.prompt() or quo.prompt.Prompt has been given, the input is hidden in quo.prompt() or replaced by asterisks (* characters) in quo.prompt.Prompt
Using function quo.prompt()
from quo import prompt

prompt("Enter password: ", hide=True)
Using class `quo.prompt.Prompt()
from quo.prompt import Prompt

session = Prompt(hide=True)

session.prompt("Password: ")
Confirmation Prompts
To ask if a user wants to continue with an action, the confirm()
function comes in handy. By default, it returns the result of the prompt
as a boolean value:
Parameters
text(str) – the question to ask.
default(Optional[str, int]) – The default value to use when no input is given. If None, repeat until input is given.
abort(Optional[bool]) – if this is set to True a negative answer aborts the exception by raising Abort.
suffix(str) – a suffix that should be added to the prompt.
show_default(Optional[bool]) – shows or hides the default value in the prompt.
err(bool) – if set to true the file defaults to stderr instead of stdout, the same as with echo.
from quo import confirm

confirm('Do you want to continue?')
System prompt
If you press meta-! or esc-!, you can enter system commands like ls or cd.
from quo.prompt import Prompt

session = Prompt(system_prompt=True)

session.prompt("Give me some input: ")
Suspend prompt
Pressing ctrl-z will suspend the process from running and then run the command fg to continue the process.
from quo.prompt import Prompt

session = Prompt(suspend=True)

sessiom.prompr("Give me some input: ")
Prompt bottom toolbar
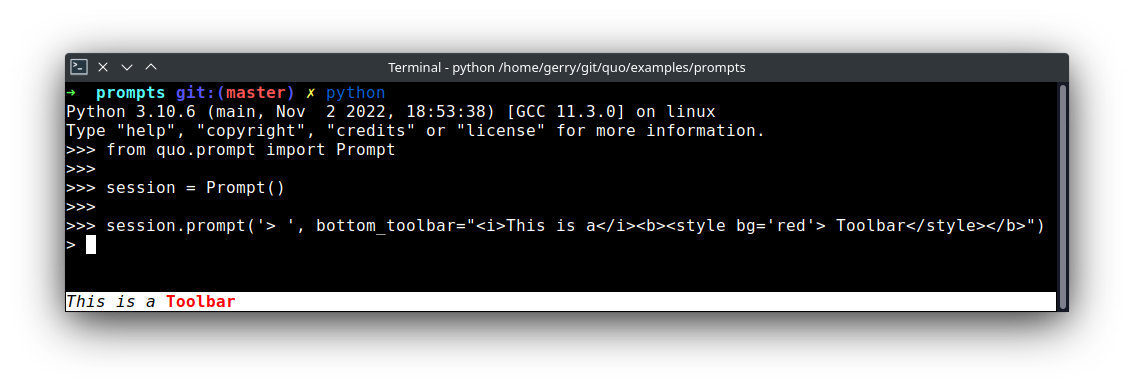
Adding a bottom toolbar is as easy as passing a bottom_toolbar argument to prompt(). This argument be either plain text, formatted text or a callable that returns plain or formatted text.
When a function is given, it will be called every time the prompt is rendered, so the bottom toolbar can be used to display dynamic information.
By default, the toolbar has the reversed style, which is why we are setting the background instead of the foreground.
from quo.prompt import Prompt

session = Prompt()

session.prompt('> ', bottom_toolbar="<i>This is a</i><b><style bg='red'> Toolbar</style></b>")
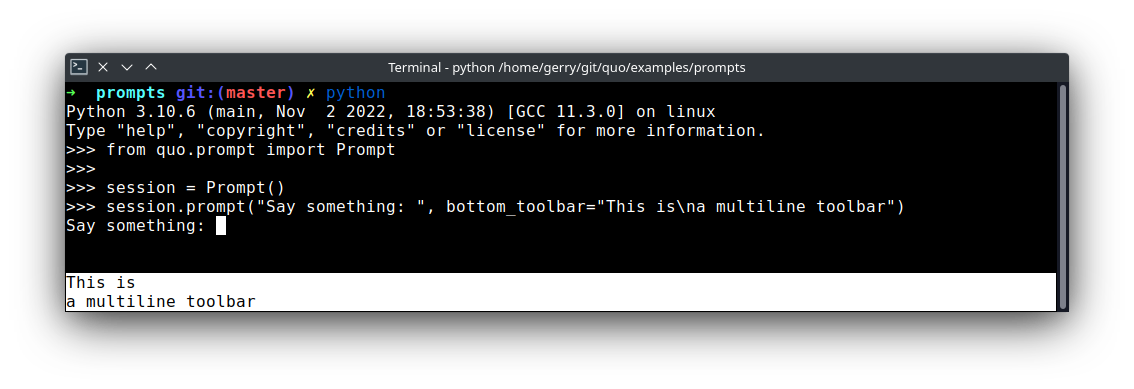
Here’s an example of a multiline bottom toolbar.
from quo.prompt import Prompt

session = Prompt()

session.prompt("Say something: ", bottom_toolbar="This is\na multiline toolbar")
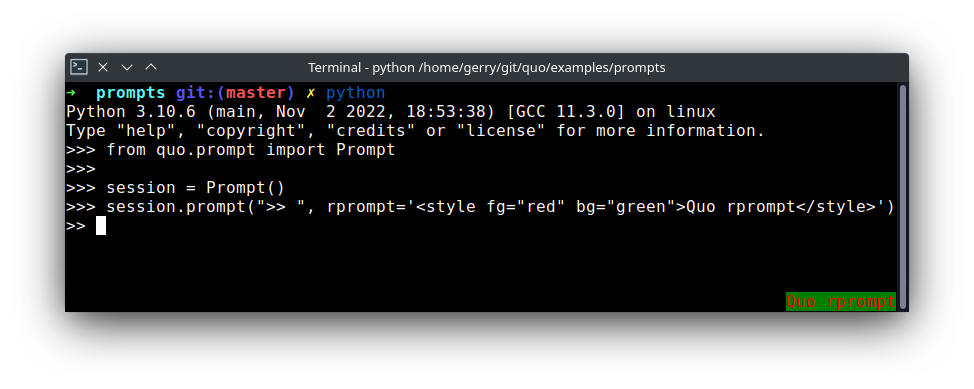
Right prompt(rprompt)
The quo.prompt.Prompt class has out of the box support for right prompts as well. People familiar to ZSH could recognise this as the RPROMPT option.
This can be either plain text, formatted text or a callable which returns either.
The following example returns a formatted text:
from quo.prompt import Prompt

session = Prompt()
session.prompt(">> ", rprompt='<style fg="red" bg="green">Quo rprompt</style>')
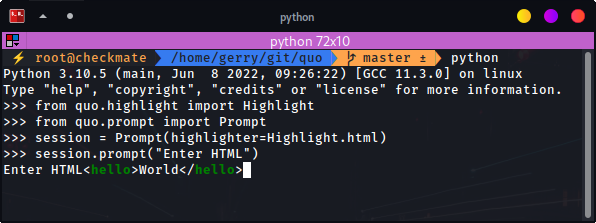
Syntax highlighting
Quo ships with an intuitive syntax highligher.
It is also possible to create a custom highligher by implementing the Highlight class.
(changed since v2022.9)
from quo.prompt import Prompt
from quo.highlight import Highlight

session = Prompt(highlighter=Highlight.html)

session.prompt('Enter HTML: ')
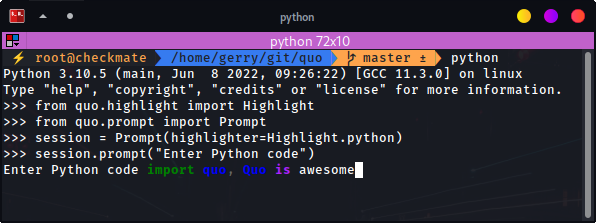
If you want to use another style you can do the following:»
from quo.prompt import Prompt
from quo.highlight import Highlight

session = Prompt(highlighter=Highlight.python)
session.prompt('Enter Python code: ')
or:»
from quo.prompt import Prompt
from quo.highlight import Highlight

session = Prompt(highlighter=Highlight.css)
session.prompt('Enter css: ')
Syntax highlighting is as simple as adding a highlighter. All of the available syntax styles can be found here or Read more about styling.
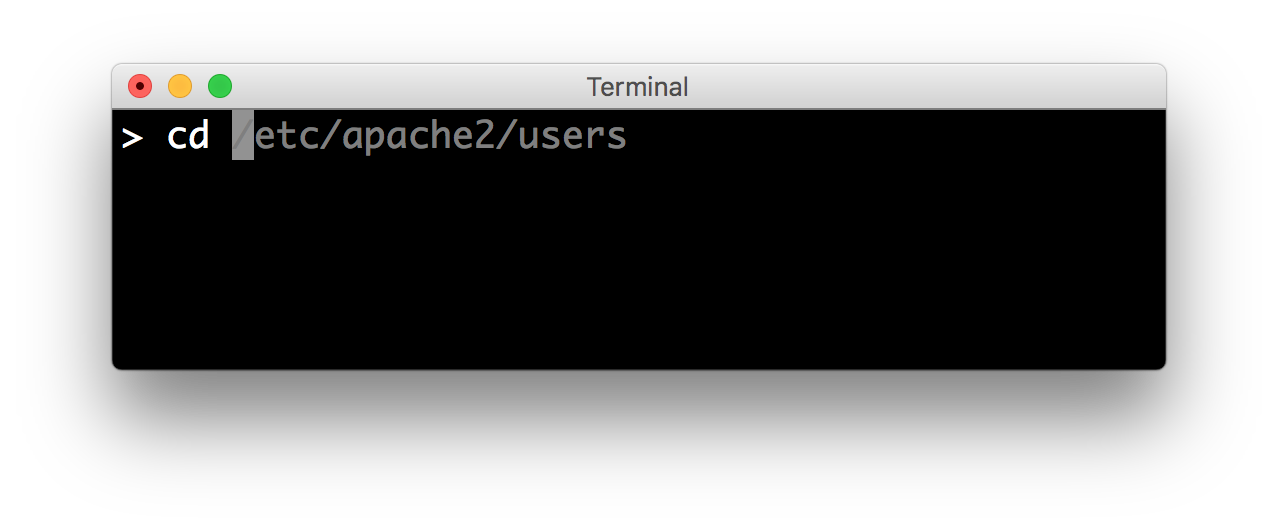
Placeholder text
A placeholer is a text that’s displayed as long as no input is given. This won’t be returned as part of the output. This can be a string, formatted text or a callable that returns formatted text.
Plain text placeholder
from quo.prompt import Prompt

session = Prompt()

session.prompt("What is your name?: ", placeholder="..(please type something)")
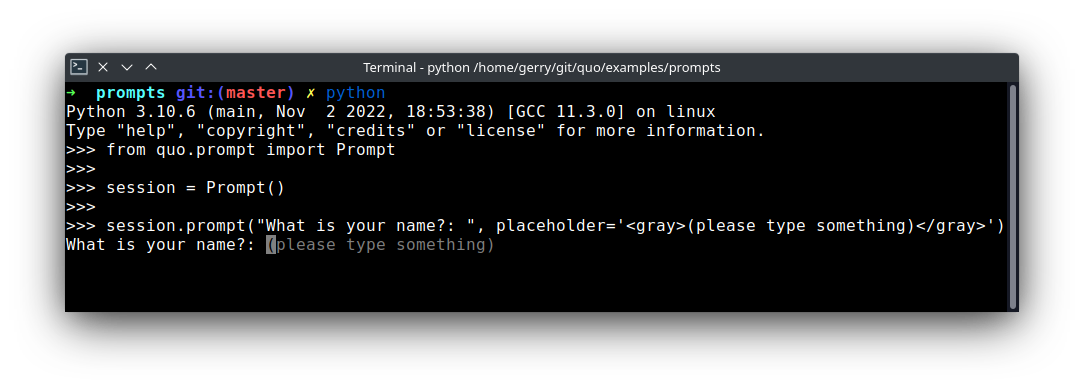
Formatted text placeholder
from quo.prompt import Prompt

session = Prompt()
session.prompt("What is your name?: ", placeholder='<gray>(please type something)</gray>')
Colors
By default, a neutral built-in color syntax is used, but any style instance can be passed to the Prompt class.
Note
quo.prompt() has different semantics and cannot output colored text but quo.prompt.Prompt has several ways on how this can be achieved.
Plain text prompt
from quo.prompt import Prompt

session = Prompt()

session.prompt("What is your name?: ")
Formatted text prompt
added on v2023.2
It is possible to add some colors to the prompt itself. In the following example, the prompt will be in green. added on v2023.2
from quo.prompt import Prompt

session = Prompt()
session.prompt("<green>What is your name?: </green>")
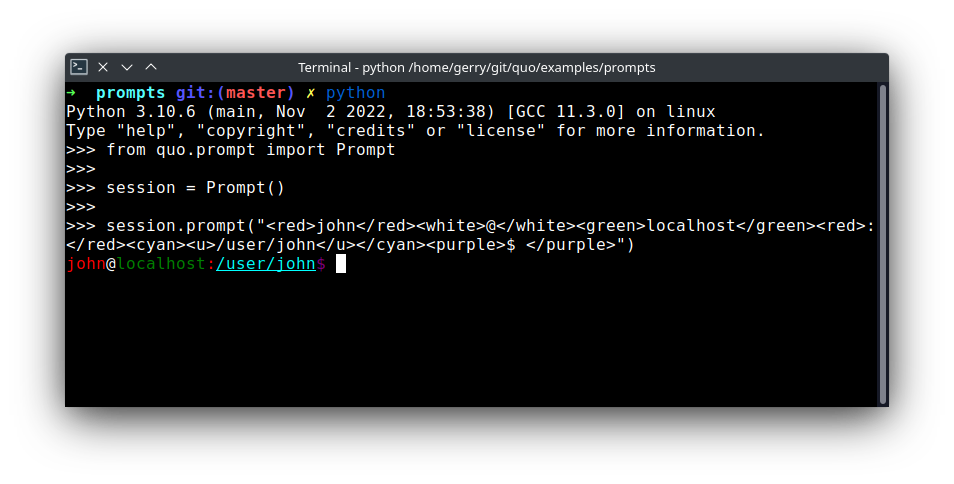
Styled prompt
from quo.prompt import Prompt

session = Prompt()
session.prompt("<red>john</red><white>@</white><green>localhost</green><red>:</red><cyan><u>/user/john</u></cyan><purple>$ </purple>")
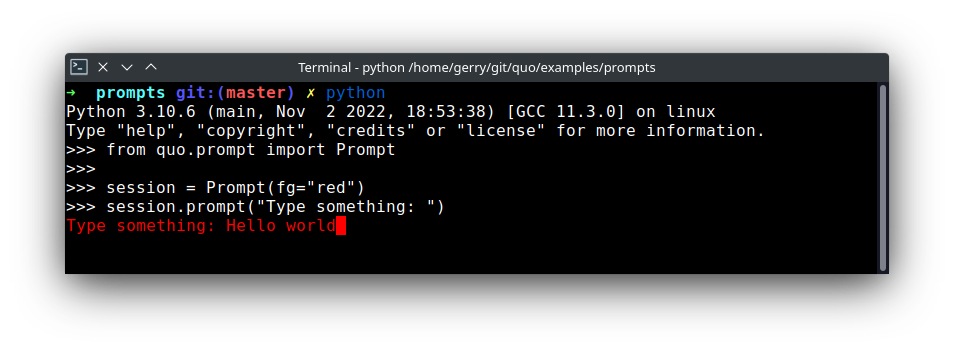
Coloring the prompt and the input
It is possible to add some colors to the prompt itself and the input. In the following example, the prompt and the input will be in red
version changed 2023.2
from quo.prompt import Prompt

session = Prompt(fg="red")
session.prompt("Type something: ")
fg and bg parameters added on version 2023.2 .. code:: python
from quo.prompt import Prompt
session = Prompt(fg=”red”, bg=”green”)
session.prompt(“Type something: “)
Here’s an example upgrade:
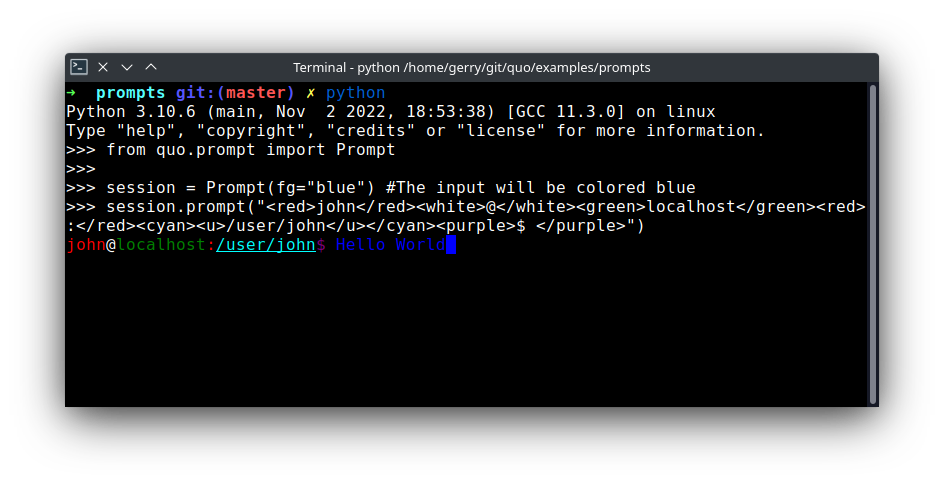
from quo.prompt import Prompt

session = Prompt(fg="blue") #The input will be colored blue

session.prompt("<red>john</red><white>@</white><green>localhost</green><red>:</red><cyan><u>/user/john</u></cyan><purple>$ </purple>")
The message can be any kind of formatted text, as discussed here. It can also be a callable that returns some formatted text.
By default, colors are taken from the 256 color palette. If you want to have 24-bit true color, this is possible by adding the color_depth=ColorDepth.TRUE_COLOR option to the Prompt .
from quo.prompt import Prompt
from quo.color import ColorDepth

session = Prompt(color_depth=ColorDepth.TRUE_COLOR)

session.prompt("<style fg='red' bg='blue'>What is your name:? </style>")
Completion
Auto suggestion
Auto suggestion is a way to propose some input completions to the user like the fish shell.
Usually, the input is compared to the history and when there is another entry starting with the given text, the completion will be shown as gray text behind the current input. Pressing the right arrow → or ctrl-e will insert this suggestion, alt-f will insert the first word of the suggestion.
Added :param:`suggest` on v2022.5
Note
When suggestions are based on the history, don’t forget to share one History object between consecutive prompt calls. Using a Prompt
Example:
from quo.prompt import Prompt
from quo.history import MemoryHistory

MemoryHistory.append("import os")
MemoryHistory.append('print("hello")')
MemoryHistory.append('print("world")')
MemoryHistory.append("import path")

session = Prompt(history=MemoryHistory, suggest="history")
while True:
      text = session.prompt('> ')
      print(f"You said: {text}")
A suggestion does not have to come from the history. Any implementation of the AutoSuggest abstract base class can be passed as a string i.e history, dynamic or conditional
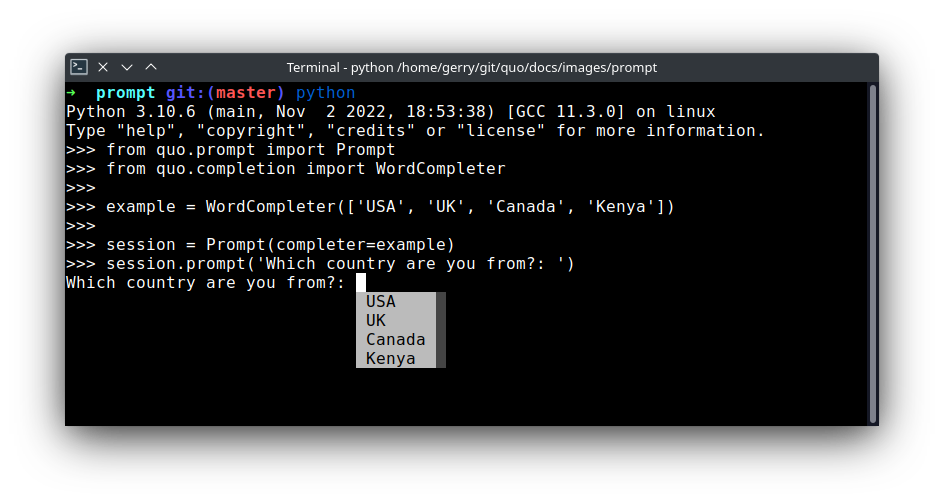
Autocompletion
Autocompletion can be added by passing a completer parameter.
Press [Tab] to autocomplete
from quo.prompt import Prompt
from quo.completion import WordCompleter

example = WordCompleter(['USA', 'UK', 'Canada', 'Kenya'])
session = Prompt(completer=example)
session.prompt('Which country are you from?: ')
WordCompleter is a simple completer that completes the last word before the cursor with any of the given words.
Demonstration of a custom completer class and the possibility of styling completions independently.
from quo.completion import Completer, Completion
from quo.prompt import Prompt

colors = [
    "red",
    "blue",
    "green",
    "orange",
    "purple",
    "yellow",
    "cyan",
    "magenta",
    "pink",
    ]

class ColorCompleter(Completer):
    def get_completions(self, document, complete_event):
         word = document.get_word_before_cursor()
         for color in colors:
             if color.startswith(word):
                 yield Completion(
                           color,
                           start_position=-len(word),
                           style="fg:" + color,
                           selected_style="fg:white bg:" + color,
                           )

session = Prompt(completer=ColorCompleter(), complete_style="multi_column")
session.prompt("Type a color: ")

Nested completion
Sometimes you have a command line interface where the completion depends on the
previous words from the input. Examples are the CLIs from routers and switches.
A simple WordCompleter is not enough in that case. We want to to be able to define completions at multiple hierarchical levels. NestedCompleter solves this issue:
from quo.prompt import Prompt
from quo.completion import NestedCompleter

completer = NestedCompleter.add({
    'show': {
        'version': None,
        'clock': None,
        'ip': {
            'interface': {'brief'}
        }
    },
    'exit': None
 })
 session = Prompt(completer=completer)
 session.prompt('# ')
Whenever there is a None value in the dictionary, it means that there is no further nested completion at that point. When all values of a dictionary would be None, it can also be replaced with a set.
Complete while typing
Autcompletions can be generated automatically while typing or when the user presses the tab key. This can be configured with the complete_while_typing option:
session.prompt('Enter HTML: ', completer=completer, complete_while_typing=True)
Notice that this setting is incompatible with the enable_history_search
option. The reason for this is that the up and down key bindings would conflict
otherwise. So, make sure to disable history search for this.
History
A History object keeps track of all the previously entered strings, so that the up-arrow can reveal previously entered items.
MemoryHistory
The recommended way is to use a Prompt, which uses an MemoryHistory which has ^ (up) arrow partial string matching enabled by default.
from quo.history import MemoryHistory
from quo.prompt import Prompt

MemoryHistory.append("import os")
MemoryHistory.append('print("hello")')
MemoryHistory.append('print("world")')
MemoryHistory.append("import path")

session = Prompt(history=MemoryHistory)

while True:
    session.prompt()
FileHistory
To persist a history to disk, use a FileHistory instead of the default MemoryHistory. This history object can be passed to a Prompt.
For instance:
from quo.history import FileHistory
from quo.prompt import Prompt

history = FileHistory("~/.myhistory")
session = Prompt(history=history)

while True:
    session.prompt()
Adding custom key bindings
By default, every prompt already has a set of key bindings which implements the usual Vi or Emacs behaviour. We can extend this by passing quo.keys.bind() which is an instance of Bind.
Note
quo.prompt() function does not support key bindings but quo.prompt.Prompt does
An example of a prompt that prints 'hello world' when Control-T is pressed.
from quo import print
from quo.keys import bind
from quo.prompt import Prompt

@bind.add('ctrl-t')
def _(event):
# Print `Hello, World!` when `ctrl-t` is pressed."
    print("Hello, World!")

   @bind.add('ctrl-x')
def _(event):
  #Exit when `ctrl-x` is pressed. "
    event.app.exit()

session = Prompt()

session.prompt('> ')
Conditional Key bindings
Often, some key bindings can be enabled or disabled according to a certain condition. For instance, the Emacs and Vi bindings will never be active at the same time, but it is possible to switch between Emacs and Vi bindings at run time.
In order to enable a key binding according to a certain condition, we have to
pass it a Condition instance. (Read more about filters.)
import datetime
from quo.filters import Condition
from quo.keys import bind
from quo.prompt import Prompt

@Condition
def second_half():
    " Only activate key binding on the second half of each minute. "
    return datetime.datetime.now().second > 30

@bind.add('ctrl-t', filter=second_half)
def _(event):
    # ...
    pass
session = Prompt()
session.prompt('> ')
Toggle visibility of input
Display asterisks instead of the actual characters with the addition of a ControlT shortcut to hide/show the input.
from quo.filters import Condition
from quo.keys import bind
from quo.prompt import Prompt

hidden = [True]  # Nonlocal

@bind.add("ctrl-t")
def _(event):
    "When ControlT has been pressed, toggle visibility."
    hidden[0] = not hidden[0]

session = Prompt(hide=Condition(lambda : hidden[0]))
session.prompt( "Password: ")
Mouse support
There is limited mouse support for positioning the cursor, for scrolling (in case of large multiline inputs) and for clicking in the autocompletion menu.
Enabling this can be done by passing the mouse_support=True option.
from quo.prompt import Prompt

session = Prompt(mouse_support=True)
session.prompt('What is your name: ')
Line wrapping
Line wrapping is enabled by default. This is what most people are used to and this is what GNU Readline does. When it is disabled, the input string will scroll horizontally.
from quo.prompt import Prompt

session = Prompt(wrap_lines=False)
session.prompt('What is your name: ')
» Check out more examples here